The Gate House

This is my fourth project and my first quarter scale (1/48ths). The Gate House is part of a country estate in the Cairngorms in Scotland.

Pages

  • Home
  • Published
  • Vendors
  • Narrative
  • Tips
  • Tools
Showing posts with label Lighting. Show all posts

Wednesday, 10 December 2014

Lighting - True2Scale

When I was at the Philly show I stopped by True2Scale's stand - why would I not?

Carol, who has an amazing memory for stuff, remembered that I had been wittering to her at some point about needing longer wires for my lights and fires.  She had devised an elegant solution to the problem...... this is it:


simple connectors, no need to solder or wrap

just plug and go
I have filched Carol's description of the item from her site to explain how this works:  


PRODUCT DESCRIPTION

The perfect solution for extending the length of wires when lighting a project. These also provide the ability to easily disconnect the wires from a project when moving the project.
How the wired connectors work: the small pins on the male end of these wired connectors are pushed into the holes in the female connector. Then, the wires on each of the connector ends are twisted to the negative and positive wires (red to red, black to black) on the project. Shrink tubes are put over the twisted connections and are heated.
  • 1 male and 1 female connector per set. The wires are attached.
  • Set includes shrink tube connectors. No need for soldering!
  • 8" long. The wires may be cut and stripped to any length.
  • These may be used with 12V, 9V and 3V systems; including round wire systems, a 9V battery, and the 3V battery systems that we offer.
The wired connectors work well with our Base Kit for Lighted Structures. The wired connectors make it easy to extend the wires from the project into a battery holder and switch that is hidden in the drawer under the base. So, no need to plug anything into a wall outlet and it makes transporting the project easy!


These wired connectors are also great for connecting/disconnecting different systems. For example, if a wall adapter system is used to light a project at home, but a battery system will be used for traveling to a show, 2 sets of these connectors could be purchased. One end of the wired connector would connect to the wall adapter; the same end from the other set would connect to the battery holder; while the opposite end from one of the sets connects to the lights in the project. 
At just $1 or 64p per set how can you beat it? 
-----------------------------------------------------------------------------------------------------------------------

I you are in the UK and want to shop from home Jennifer Smith has them too.  She also does small connector blocks if you want to join multiple wires rather than one to one.


Posted by burygardeners at 15:31 2 comments:
Email ThisBlogThis!Share to XShare to FacebookShare to Pinterest
Labels: Lighting

Friday, 31 October 2014

Lighting - Evan update

Just an update from Evan Designs about the lighting.  Don't forget if I can help just ask.  Haven't done much lighting yet in this scale but think I have it sussed thanks to Evan Designs who decidedly went above and beyond.......


So you need an adapter with a switch, it is there now....
http://www.modeltrainsoftware.com/3-volt-adapter.html

And red and black wire are here
http://www.modeltrainsoftware.com/kynarwire.html

I also ordered in some "quick change up" units, for those who see the need to swap between adapter and battery.  Like when you want to show off your beautiful creation, say at a club meeting or show and a wall plug is not handy.  I go over that on this page
http://www.modeltrainsoftware.com/pin-connectors.html (scroll down for the pictures) but to make it easier, I am having some AA holders made with a pin connector female already part of them.  And some power jacks also with pin connector female.  Then, if you hook the leads coming from the various floors to a male pin connector,  you can quickly plug or unplug from either supply.
I ordered them today so they are likely coming in about 10 days. 


PS:  If you are in the UK and want to shop nearer home - this is your lady:

Jennifer Smith's small scale lights


Get out all the lights you can - it is Hallowe'en!
Posted by burygardeners at 18:46 No comments:
Email ThisBlogThis!Share to XShare to FacebookShare to Pinterest
Labels: Lighting

Tuesday, 21 October 2014

Post script to Lighting

Many thanks to everyone who has added help to my lighting thinking.  I will copy it here in case it helps anyone else too.

First from Joanne W:


click to enlarge


Next two responses from Jennifer.  I know these are in the comments boxes but not everyone reads those:


It's worth pointing out that LEDs run on much lower power than the old style filament bulbs. LEDs are normally a maximum on 20mA (filament bulbs are typically 50mA) so you can run far more LEDs off a transformer than you can of standard filament bulbs. Like you say, 50 LEDs off a 1amp transformer whereas it would only be 20 standard filament bulbs


The LEDs are clear because that's just the epoxy housing. It's quite complicated but in simple terms the colour of LED is produced by creating different wavelengths of light. When voltage is passed through it lights up.
You can get LEDs with coloured housing but these tend to be much dimmer and not so useful for miniatures


Posted by burygardeners at 19:27 No comments:
Email ThisBlogThis!Share to XShare to FacebookShare to Pinterest
Labels: Lighting

Lighting and how-to.... maybe

I have finally stopped pestering Evan Designs about my lighting and written up my notes in detail so I don't forget any time I come to light a very large project.

The basic method for putting lights in and attaching them to 3V coin batteries is straight forward enough thanks to the kits you can buy - the only challenge there is how to hide the wires and maybe the battery and switch.

I wanted a much bigger plan for 42 bulbs (approx).  Basically if the total is under 50 I can take them to a 1 amp adapter and then on to the mains supply.  The adapter can be left plugged in it does not draw power if the switch is off.

I have made myself notes on how to do it.  

The ingredients needed are:


  • Lights bulbs in chip and two smaller sizes for whatever I want to light in the house.
  • Flickering fire kits for the fireplaces.
  • Red Hook-up wire
  • Black Hook-up wire (you could just use one roll but you need to be sure you remember what is what, so for the sake of another $3 you may as well make your life easy and have one of each)
  • Power Jack
  • 1 amp switched adapter. (You can put the switch(es) in various places on the circuit and have multiple ones if you want, depending on what you want it to do - for me it is all on or all off)
Think long and hard about what bulbs you want where, how best to get the wires to their ultimate destination and power source, draw a plan, make notes - maybe not as fancy as this - back of a napkin will do!

If you want a copy of this - email me and I will send you a PDF link


click to enlarge

Big thanks to Evan designs and Heather and Paula and a couple of other people who didn't know they were helping me....  so much faster than trying to get there on your own.


Posted by burygardeners at 01:42 2 comments:
Email ThisBlogThis!Share to XShare to FacebookShare to Pinterest
Labels: Lighting

Sunday, 19 October 2014

Rubbing two sticks together - Evan Design's Fires


Evan designs

Five fire kits from Evan designs arrived yesterday.  Incidentally their lighting section is soon to become its own little thing under the auspices of www.LightYourModels.com.  That reference already takes you to the section we mini-folk use.

Thanks to Heather Drinkwater who did a splendid PDF for The Beehive (another good reason to join) I have no qualms about making fires/fireplaces.  I was going to say I can't try my hand until I get home and find which fireplace fits where but I am thinking I might chance it and make one of the Les Roches fires over here and if it won't fit in either of these two projects it will just have to hang about until it goes somewhere.

I think I may have a way round the problem of not having planned for fires in The Gate House in advance of building it, but again that will have to wait until I get home.

The only thing to sort out with these kits is whether three bulbs will be too big for a small fireplace - I suspect they will, but in the grand French fireplace they may not prove to be a problem.  These are 1.8mm bulbs as opposed to the chip I used for the lighting and are therefore bigger.  This isn't insurmountable as the lovely Heather says she has used one orange flickering bulb very successfully in a fireplace so that will be the answer I am sure.  Oddly, looking at the kit, they all look clear????

Since getting these it has kicked off delusions of grandeur and I am now dreaming of making a property with about thirty bulbs for lighting and four fire places - making another twelve bulbs, so am considering a much more sophisticated system of lighting it.

Basically I reckon the 42 (two times) wires will go to a connecting strip like this one

This is way too big and has switched connectors but gives an idea of what I mean

This then goes to a 3V single switch 1 amp adapter, which then plugs in to the mains.  You can have several switches in this system in various places depending on what effects you want; for me it is a case of all on or all off.  Pretty much only I look at my stuff and I would want it all lit to look at it properly.

Right now I am in correspondence with the terrific Evan's to check out stuff like can the flickering fires and lights run through the same connecting strip - I think they probably can't.  Incidentally if you have candle or (early) gas lit houses you can definitely run them all together however you connect up to your power source (like using the 3V batteries) because the fires will make your lights flicker just as they would have done.

When I have a definitive wiring plan I will draw it up and post it here even though its not for this project.  The project it will go in is not even 'found' yet.


Posted by burygardeners at 18:51 2 comments:
Email ThisBlogThis!Share to XShare to FacebookShare to Pinterest
Labels: Lighting

Friday, 10 October 2014

Evan Designs

Yet another great vendor in the mini world - Evan Designs.  Don't be misled by its trainyness and think its not for you - their lighting certainly is and if you go on a good rummage around the rest of the site you will certainly find other stuff of interest.  (Take care with the name - I keep typing Evans rather than Evan but maybe that's my Welsh ancestry kicking in).

I faffed around with my order - emails back and forth - and they were speedy, patient, informative, helpful everything you could want.  This was followed by a very fast delivery of the order and a great discount as I bought quite a lot.


click picture to enlarge

I have sixty 3 volts DC LEDs in warm white and chip size BUT I have extra long wires (14") as the Gate House needs quite a length to wander stuff hither and yon.  Along with this are six 3V Battery Holder/Switches (with the coin cell batteries needed).  Each battery will take about ten lights, hence the six and sixty.

I also have a code for 15% off my next $30 order and if it is over $40 it comes with free shipping - all round good eggs at Evan Designs.

The most helpful thing of all, believe it or believe not, is a brilliant strip across the bottom of the enclosed leaflet showing the range and sizes of LEDs from 5mm down to 1.25mm.  There are two more sizes smaller than Chip - Nano (1.8mm) and Pico (1.25mm).  I am already stewing on how they can be used in quarter scale.

Theoretically this order should keep me going for the next twenty years; enough for six more projects (at 69 that may be a bit optimistic) but I am, already thinking I could do this or that if I use the teeny, weeny bulbs.  If I do come to any conclusions I know where to buy them from, even if I am back in the UK.  Such a great vendor.

If you click on the link I attached to their name it will take you to the lighting section but if you click here Lights for Minis it takes you to a page loaded with instructions not to mention additional purchasing temptation such as Fire!!  Yup, I'm gonna have to go back.

There are also links to some great (simple, as in clear) how-to videos if you are feeling nervy about having a go.  There is a FAQs section too which I am pretty sure will cover anything else.  All in all Evan designs is a one-stop-mini-lighting shop, especially useful for 48ths.


Posted by burygardeners at 19:13 No comments:
Email ThisBlogThis!Share to XShare to FacebookShare to Pinterest
Labels: Lighting

Wednesday, 1 October 2014

How I did the lighting

Thelma asked me how I did the lighting.  I would have shared but I have no idea if my approach is the best one!  All I did was do the wiring for the lights exactly as I would do for round wiring in a 1/12th.

Let me just say whatever scale you are in I wouldn't use copper tape system - thousands do - all I said was I wouldn't.  I think it is fraught with problems - if it fails in any way it is often difficult to find the source of the failure and very hard to remove and replace the wiring.  It is known to degrade over time especially if under wallpaper (not acid free) and or next to glue etc etc.  The round wiring sytem - using those little plugs on the ends of wires dangling from lights is much the simplest to put in and 'repair', swap, replace.

So my basic method in 1/12ths using that system is what I did here;  I just moved down in scale to LED chips and batteries rather than plugs, power strips, transformer and mains electricity.

My lights came from True2Scale but I know a lot of people use Evan Designs.  They both offer a how-to-do-it section - this is a link to the one I read at True2Scale.  

http://www.true2scale.com/led-lighting-tutorial

Where I am up to so far is just these three lights in the kitchen.


three different lights in this room

Firstly I made a paper template of the ceiling area where  the lights would be going.  Basically, in this case, it was  pretty much a four inch square.  I then put it on the floor of the room the lights were going in and arranged all the furniture etc on it to see where things would end up.  You need to do this for real as you have to take into account doors and windows and room to walk around etc etc.  I then put gentle pencil mark guides here and there on the paper and pulled the whole thing out and set it up again to be sure it was OK.

I then marked exactly where I wanted the lights to go.  I wanted a dropped light over the dining table, one recessed into the ceiling over the sink and one above the cooker.

The piece of paper then went on to the floor above - it wasn't glued in place so that made it easy - and I drilled the appropriate holes using a small hand drill.  The wires on these LEDs are very fine so you need a very small drill.  

For the 1/8th recessed eyelet I just increased the bit size about three times until I got the hole I wanted and then tapped the eyelet in place.

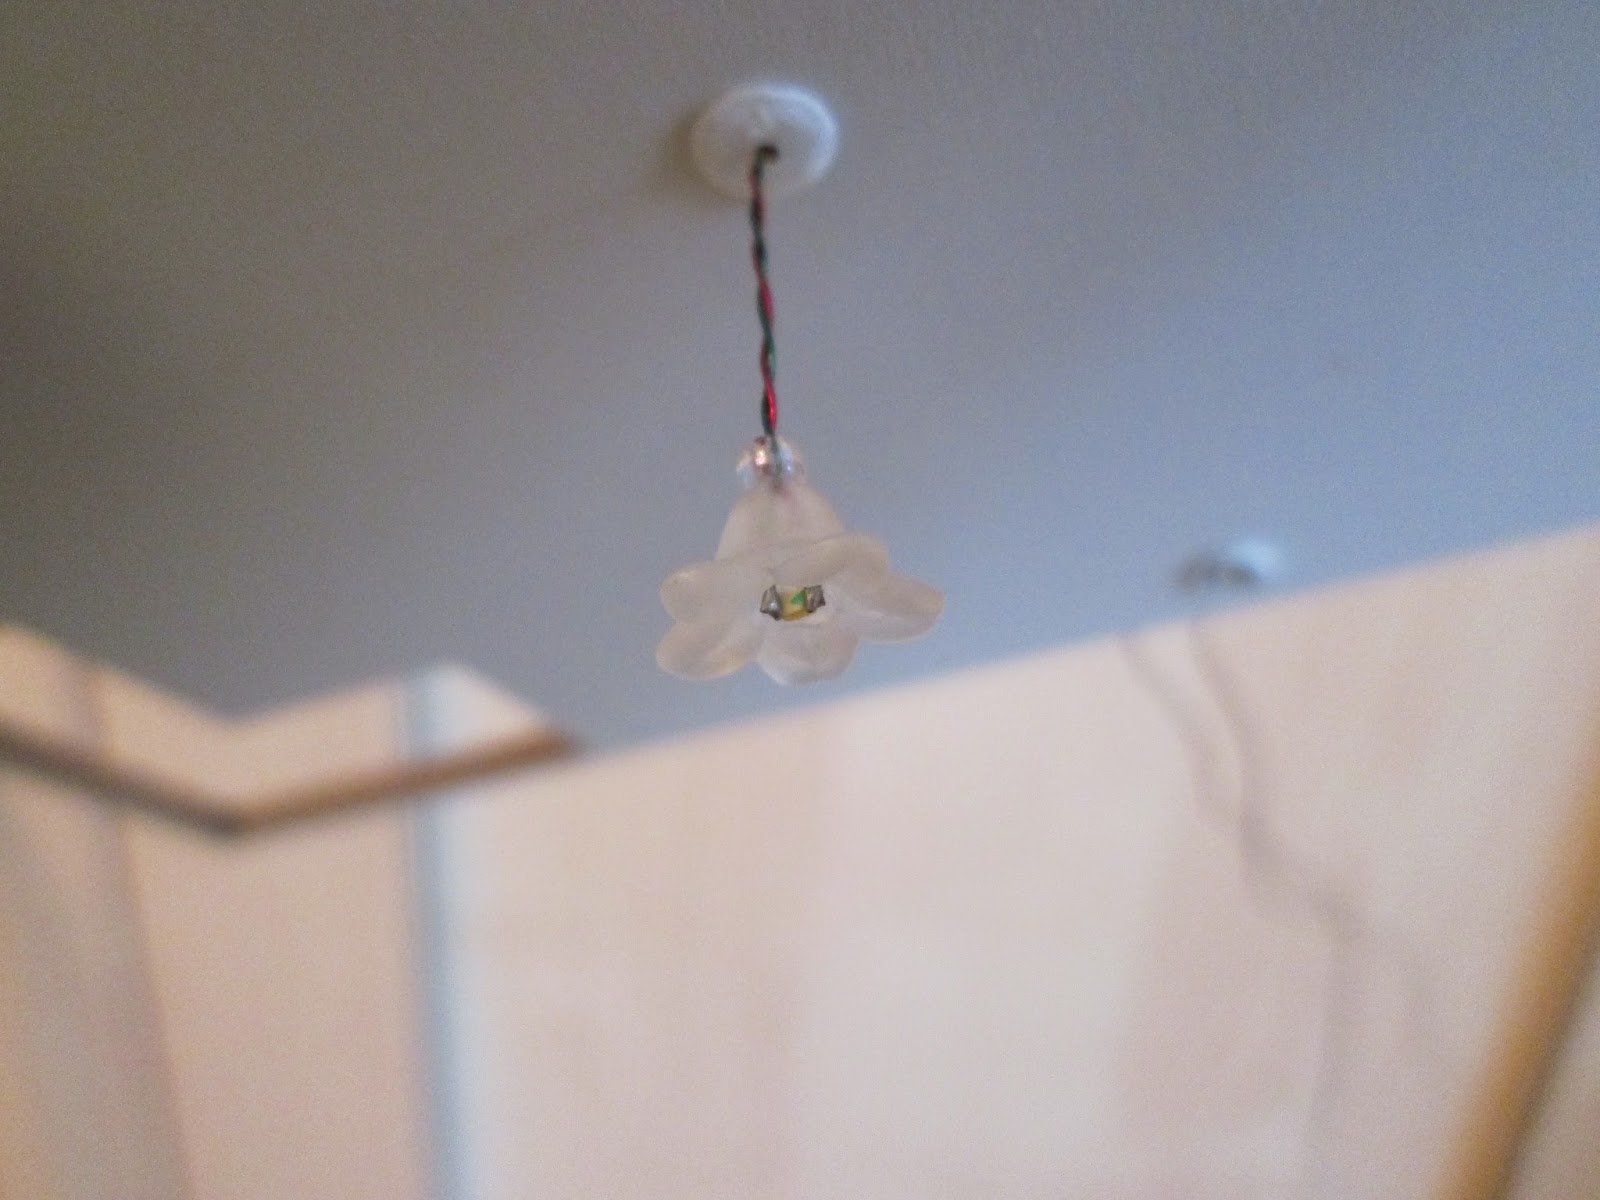
The dropped light is a flower bead and a small bead above that to help finish it off.  Getting the height right was the most difficult part;  I eventually did that by cutting paper strip the height of a person and dropping the height to their eye level.  Could have done it by making it 3/8ths higher than the table (18 inches real life).  I wanted some sort of ceiling rose fixing - all I could think of was a sequin, painted white and turned so it sort of 'cupped' the ceiling.

The light over the cooker is behind the chimney access cover so it is just threaded through.  I did put a bead beneath the hole to stop it pulling through when i was trying to tighten the wires to make them lie flat as they run across the floor above.

It is then a case of deciding for sure where you want the wires to exit - that will depend entirely on you and the kit you are doing.  In my case I am probably going for a simple battery on the back arrangement.  I am not struggling to conceal everything because the building isn't really 360 degrees and I won't be setting it in a landscape as many people do.

I drilled a hole in the room above the kitchen in the centre of the back wall right where the floor butts into place.  There will be a skirting board to hide any tiny visible flaws.  All three wires came up through their various holes and went through this single hole and out to the back.

In 1/12ths I make grooves in the floor to carry the wires but I think these wires are so fine they will sit under the real wood flooring I am putting in without making any bumps (we shall see!)  If you were using paper floors you would need to mount that on card.  The floors will just have a minimum of double sided sticky tape holding them in place then if there is any problem with alight or I fancy changing it for something better I can lift the floor pull the light out and do a swap.  No so easy of course with quarter scale as everything will be stuck to the floor, so I am not planning on it.

From there the ends of the wires temporarily twisted into the battery system just see if they worked.  Take a look at the instructions link  for this.  Eventually there will probably be ten bulbs wired to the one battery kit.  I am not sure yet how many lights I will have around the whole building - so much depends on furniture placement and if I can make table lamps, wall lights, bathroom lights, standard lamps and fires to light up.

I hope this helps - I am sorry this isn't my usual picture and text (or even UTube) 'demo' but the build is on one side of the Atlantic and I am now on the other.  Please, please ask me about anything that this explanation doesn't make clear'or I have missed out.  That is one of the main reasons for the blog - to share.


Posted by burygardeners at 21:36 No comments:
Email ThisBlogThis!Share to XShare to FacebookShare to Pinterest
Labels: Lighting

Tuesday, 30 September 2014

Lighting

My first quarter scale lights.  


The centre light is low over the dining table.  The ceiling rose is a reversed sequin (painted white).


This is a recessed light over the sink unit.  It is a 1/8th inch eyelet.  I have 99 left!!  How many can I get in one bathroom  Looks like I will need two batteries.  You can attach ten bulbs per battery I am told.

The third light in the room didn't need anything fancy as it is hidden behind the access to the chimney cover over the Aga.  That said I did have to thread a bead behind it to help it locate in the space.  these nano chips are so small.  As you can see they fit comfortably inside something like a 1/16th inch space.

Posted by burygardeners at 07:00 5 comments:
Email ThisBlogThis!Share to XShare to FacebookShare to Pinterest
Labels: Lighting
Older Posts Home
Subscribe to: Posts (Atom)

Labels

  • Accessories (11)
  • Animals (1)
  • Bathroom fitments (1)
  • Chairs (5)
  • China (3)
  • Clocks (4)
  • Cooking essentials (2)
  • Cupboards (8)
  • Desk (1)
  • Electrical items (3)
  • Exterior walls (1)
  • Fabric/Wallpaper (4)
  • Fireplaces (2)
  • Floors (3)
  • Food (1)
  • Glassware (1)
  • Information (34)
  • Kitchen fitments (3)
  • Lighting (8)
  • Mirrors (3)
  • Outdoors (4)
  • Roofing (1)
  • Rooms (1)
  • Rugs (1)
  • Shows (4)
  • Sofas (2)
  • Tables (5)
  • The Build (6)
  • Tools (12)
  • Wood trims (2)

Where to find my other blogs

  • all my blogs

Blog Archive

  • ▼  2015 (8)
    • ▼  August (1)
      • Delete this Blog?
    • ►  April (3)
    • ►  March (2)
    • ►  January (2)
  • ►  2014 (96)
    • ►  December (3)
    • ►  November (11)
    • ►  October (27)
    • ►  September (35)
    • ►  August (9)
    • ►  May (1)
    • ►  March (2)
    • ►  February (2)
    • ►  January (6)
  • ►  2013 (15)
    • ►  December (8)
    • ►  November (7)

Photo Album

  • The Gate House - The Build
  • The Gate House - Reference
  • The Gate House - Made by me

Shopping

  • Lilliput Minis

My email address

mormson@gmail.com

About Me

My photo
burygardeners
View my complete profile

Followers

Translate

MY OTHER QUARTER SCALE PROJECT

  • Le Maison de MaĆ®tre (Petite Properties)
Picture Window theme. Powered by Blogger.