Thursday, 30 January 2014

Furniture build number three

Don't worry I don't intend to show you every single piece of furniture I make for this project; there are about 80 of them (so far) waiting for me.

I am showing you this - my third attempt at 48ths - to show you some of the problems I encountered.  I am hoping someone reading this might have a couple of tips to improve what I am doing before I move on to number four and the other seventy-odd pieces..


This table is 7/8ths of an inch wide

This is a mission style library table from Petworth Miniatures.  I have seen the prototype made up by its designer so I know it can look much better than this.

The construction begins with sticking the legs into the notched corners of the table top - how do you get them squared up properly?  I shoved each one into the corne of a right hand jig but you are working on such fine tolerances it wasn't the greatest help.  Eventually more by eye than anything else I was happy with how the four legs lined up in relation to the top and to each otjher.  Then, I can only presume, either the stain dried out properly (???) or there was some moisture from the wood glue (???) but as the glue set up the legs seemed to go every which way.  

I had stained the pieces before detaching them from their frame.  Should I have left them overnight or something to dry thoroughly before building the table?  I am using wood glue - is that OK?

It has a lovely front and back fretted trim which also distorted as it settled.

The other niggle is there is a tiny nib of wood left on the centre of the top bookshelf.  These bits of sprue (?) are where the pieces are held in the frame.  I was convinced I had filed and stained each one of them, and yet there it is!

I might just be being too picky because like the two previous pieces in real life, i.e. not magnified by a camera, it looks just dandy.

I gave myself a pat on the back for actually putting the knobs on the drawer pretty much in line with each other.  They did start out with 'one eye up the chimney' but I pushed and pulled them around with a dental pick until they looked OK.  For those who don't play this quarter scale game this is a photo of one of the knobs on the very tip of the point of a very slim scalpel. They are incredibly tiny no-hole beads.


Saturday, 25 January 2014

Handy tips from Quarter Source

When I was at the Sarasota show talking to Karen Benson and Sally Manwell I was bemoaning the fact that I was finding it really difficult to find fabrics in quarter scale.  Even in a pretend house I'd like the soft furnishings to wok with the rest of the room!

They shared a couple of ways they get round this problem and said I could share them with you...

Karen said she just prints her own on those printable fabric sheets you can buy.  The secret is buying the finest thread count cotton you can find, she uses 300. 


I am very disparaging about not using the right material for the object you are making but this is because I am still stuck in 1/12th mode.  I like wooden object to be made in wood, ceramic in ceramic and fabric in fabric.  Of course in quarter scale a lot of this OCD thinking can be tossed aside.  These drapes are paper!!  I swear, even close up and personal there is absolutely no way you would know.


Wednesday, 22 January 2014

More goodies to share

These are my 'in the mail' treats yesterday and will (most likely) be the last I will buy over here.  It is time to stop shopping and use the hours I spend trawling various websites to actually make some of them.

These came from Suzanne & Andrew's Miniatures.


This is what started the splurge.  I needed four sets of andirons and as I hadn't seen them any where else I thought I should get them while I am in the States.  These are made by Pierluigi, the same artist who made my lovely cutlery, scissors and comb.  

I hate paying postage on a four-times-two-equals-eight-dollars purchase, so I had to get something else.


This is the ubiquitous fireguard that you do see around but useful none the less for the bedroom fire in the house, which you couldn't leave burning away unattended, without a guard in front. I wonder if a lit fire will show through?


This is one of their sweet little pieces to add to the others I have of theirs - the Petit Chateau's tri-fold mirror.  I am not sure of its location in the house just yet but we can sort that.


The triumphant piece for me is one of Teresa Callender's Arts and Crafts group of furniture.  I haven't given you any link for her as it is generally agreed she isn't making things any more (since 2011).  I have tried and tried to get in touch with her as I wanted all her Arts and Crafts 1/4" and wanted her to be the person to make all my Art Deco for Muir House I also wanted to do a profile piece in DH & MS so, as you can imagine, I was sad not to get more but thrilled to get this.

I found some of her 1/2" Arts and Crafts (right style in the wrong scale) on someone's stand at Sarasota which she said she thought she'd bought last year, so who knows.....


Tuesday, 21 January 2014

Shows - Florida Gulf Coast Miniatures Festival - Sarasota, FL, USA

I did my third (Molly Cromwell) Sarasota show at the weekend and came home with some lovely reminders of a great weekend.   If you want to see a review of the show and a web album with all the shows pictures go to:  Dolls House Shows.  

To see all my purchases from the show you'll need to click on the album link over on the left.

If you just want to see a sample of what I bought for The Gate House, here we go.............

My first Purchase of the day was these  useful (I hope) little tweezers with magnifying glass.  As you can see the tweezers fold up into the arm of the glass almost begging you to pop them in your handbag - what for I don't know.  Came from Iklectic for just $6. (sorry, I can't find a website) 


My biggest spend was at Petworth Miniatures.  I bought a couple of Gayle's pieces on day one - got back to the room and eventually to bed and then made a list of the other stuff I had to have so I could go to sleep.  Notice the 'had to'.  So I have twelve of her pieces and her book about lighting in quarter scale.  This is in addition to another recent order from her - did you guess this is a vendor who's work I like.  You can see the other eleven items in the Purchases web album.  Link on the left.


I spent quite a bit of time at True2scale's table both days - there is such a lot to look at and as I want everything I see it takes even longer talking myself out of stuff.  I bought some lighting kits mostly because she sells the very teeny (nano?) LEDs which I need for the glitter house display on my fireplace - won't that be fun attempting to light a 144th and also hide the wiring.  I am going to have to spend a very long time working out how to get wires through the house.  I have done all my 1/12ths without a problem so I am going about this in the same way.  It should also be easier for me as I always use the round wire system not copper tape.  I also bought more of True2scale's delicious sticky back fabric finish paper.  I think I can find a myriad of uses for this. I love their lovely soft colours.


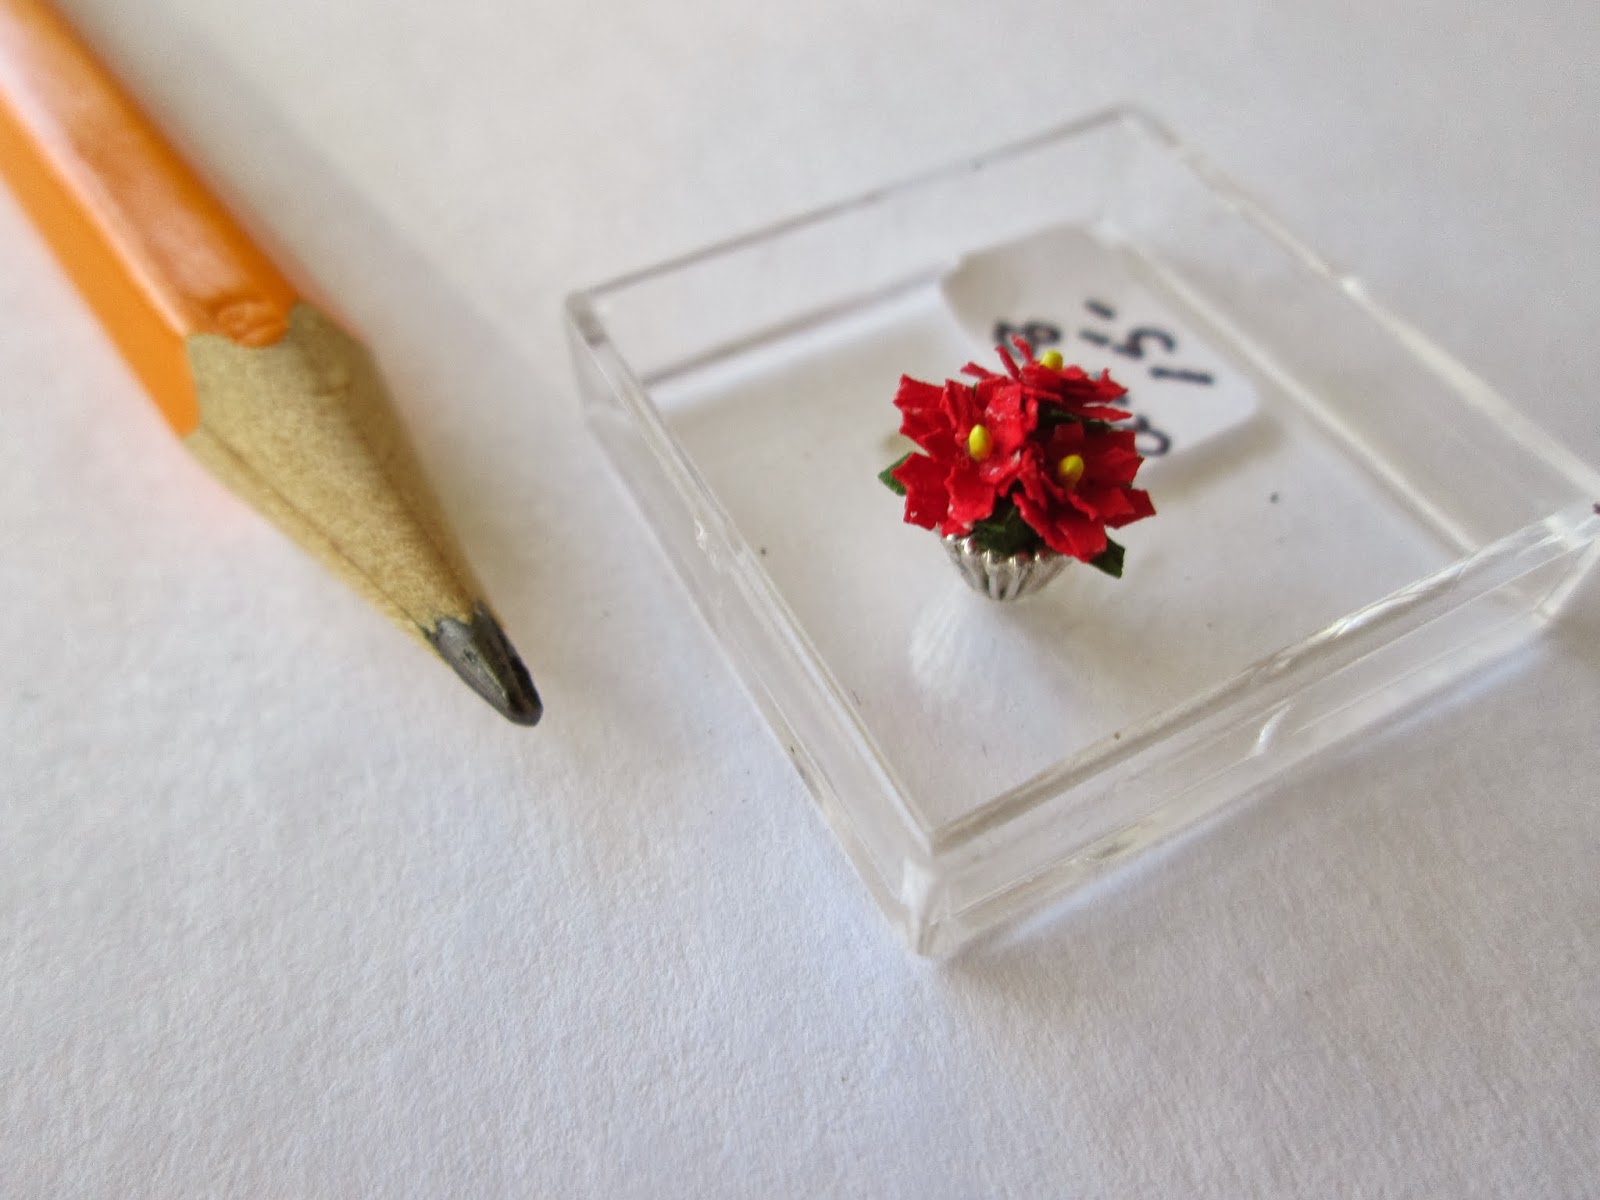
Quarter Source and Sally Manwell came up trumps with wallpaper, fabric and this sweet poinsettia rose.  I mentioned I was having a problem finding suitable fabrics and I was given a couple of great ideas from them.  I promise to share them with you (I asked if I could) in a few days - right now I have a ton of things I have to get done - both domestic and writing.


Flight of Fancy provided me with a dustbin and some door knobs with keyholes.  I seem to have bought the scale wrong on both of these as the bin measures a quarter of an inch which gives me a one foot dustbin (!) and the locks are also about a quarter of an inch..... one foot locks, mmmm.  Hey ho - locks destined for Muir House maybe and dustbin for the Baby House?


My big weak moment came when I bought Miss Lydia Pickett's Artist Storage Cabinet from Robin Betterley's Miniatures.  I have lusted after this for ages but it really doesn't have either a place in the narrative of, or even a place geographically in, the house. I just had to have something of theirs (to add to another recent order!) so it might as well be this.  Now it has become my guilt piece.


I really love the work of Barbara Meyer at Mini Gems and was so glad to have found her again.  I bought a magpie from her two or three years ago and it has been on each of my projects in turn.  When they get sold on it moves to the next.  There are about three things I cannot part with and this is one of them.  I had no record of her name and have gone from show to show hoping she would turn up and - hey presto - there she was.  I bought this wonderful quarter scale cat from her.  She had a tray of every kind of cat under the sun, various colours and stances and all somehow with their own character. There are photos in the show album.  If you want to see the birds I bought for Muir House you will have to go there and the 'other' magpie will be on display in the Chocolat blog. 


We are between visitors right now and I had wonderful plans to make one thing a day - I have done nothing.  Why can I 'work' at home relatively easily but can't seem to get started over here?  I hope to speak to you soon.  Enjoy the photos.


Thursday, 16 January 2014

Flooring and trims - A Trifle Small

This is where I have become officially 'the crazy lady'..........but it's not my fault.......I bet they all say that.

When I was going to do three houses over here I ordered my favourite flooring from A Trifle Small (what was once Molly's House).  So a lady who lives near to me in the UK sent a packet of stuff to me here in Florida and, now I'm no longer doing the American houses, I will be taking it back to the UK.  The best laid schemes o' mice and men (and miniaturists) gang aft agley.

Nevertheless it gives me another chance to show you the great real wood flooring I got from her.  The 'floorboards' are one eight of an inch wide, giving a real life measurement of six inches, which was a floor board standard for a very long time.  It looks like the 1/12th stuff I get from Jennifers of Walsall which I am pretty sure is from Houseworks here in the States, but I don't see this quarter scale on their site.


dark walnut


The dark walnut is my favourite and seems to make it into all my houses - so far only in the 1/12th scale, but it was such a joy to see it in Quarter Scale.  I usually just finish it with a couple of coats of matte water-based B & Q varnish and it looks lovely.

light wood
This is its light companion.  I have finished this to look like cheap pine and also painted it for painted Victorian floors in bedrooms - it could be aged, stained or finished a zillion ways. 

too white?
I have seen this tile and the next one on a couple of other sites, so they are not as rare as the wood flooring but if you are buying wooden floors from Angela you may as well get the rest. This or the other one might be the bathroom floor.
too checker board?


The third tile I will definitely use somewhere, probably around the bath or behind the washbasin, or maybe kitchen splashbacks... mmm?  It seems a shame to waste such a nice small tile; how often can you find that?


My last purchase was four pieces of coving which had a definite home in the Georgetown Row House I thought I was doing.  I am not sure they have a place in The Gate House as both the cottage and the gate tower would have been stone built.  Admittedly the walls have been plaster-boarded internally sometime in their lives so maybe someone had coving in the living room?

Such a shame not to use such nice stuff, good quality, well shaped and, most importantly for me (Mrs Fussy Britches), in perfect scale.  


Monday, 13 January 2014

Lincoln chairs and clock Karen Carey - All change

Those who know me won't be surprised to see me back here after saying a fond farewell for the winter.  If you follow my Quarter Life Blog as well as this one you may have seen a post saying I have given up on the the lovely little American houses which were supposed to occupy my time on the other side of the pond.  So.... here I am back with the Gate House until it is finished.

The building itself can't begin until I am back in the UK about mid-March but in the meanwhile I can have a go at making the furniture for it.  Apologies for Quarter Life readers as I am about to repeat (indeed steal from) a post in that Blog as it now really belongs here.

Here is my first go at making a 48th.......

......... and I am not a happy bunny for all sorts of reasons.

First handy tip is not to mess about with teeny stuff the day before the cleaners arrive.  When I opened the packet to start work I discovered I had lost an arm from the pair of chairs that I intended to work on. I must have dropped it when I was putting stuff back in their packets after messing around with them a couple of days before. There might have been a chance of finding it had not two ladies scrubbed our apartment to within an inch of its life.  I can't find a speck of dust never mind a chair arm.


So the day began with a slightly grumpy me as I now have to buy a pair of chairs just to get the one I need.  Hey ho.

This is one of a pair of Lincoln chairs in a kit made by Karen Carey - apologies to her for what is about to follow.

They are lovely kits made from a really thin wood so the scale is great.  The pieces are utterly easy to remove from their 'frame' - just have to nip a single tab with a sharp knife.  They aren't all sooty everywhere like some kits, though the cut edge is darker than the face.  I can't see how laser cut wood could be anything else, so that's not to their detriment.  I was happy to set off with great components and very clear and detailed instructions.

In my wisdom I somehow thought that building tiny things must take less kit than building large things so I only hauled half a dozen tools across the Atlantic with me.  I was determined not to duplicate tools on each side of the pond.  

Firstly, did I bring the absolutely  basic thing, a knife?  No!  Conceded and bought one of those, problem solved.  

Onwards and upwards.  During the build I very soon discovered I needed my magnifying glass on a stand with the little extra hand thingies like I have never needed it when doing 1/12ths.  I flat refuse to duplicate that so I shall remain a frustrated, half blind, contortionist whilst assembling this stuff. [that didn't last long, I soon bought one]

I didn't bring tiny sharp scissors and no way am I going to be able to manage with small sewing scissors and curved nail scissors so that's something I need to get.  [sorted that]  As for a couple of paintbrushes from my huge collection in the UK? - nope, they are still in the UK. [bought some of those too] What did I bring you might be asking - me too!

I deliberately didn't bring glue as the prospect of those bursting and  filling my suitcase was too horrible to imagine so, on my trip to Michaels, I bought two lots of glue: both Aleene's, the ever-useful tacky and the wood glue.  They both proved to be fairly useless but I bought them because Michaels didn't sell my favourite Deluxe glue and I was too lazy to find a store that does.  [still haven't found one; now hoping I can get it at the show next weekend]  Yet another thing to go on my ever-growing shopping list.

So discovery number one - the basic tools needed are:
  • Cutting board/work surface
  • Sharp knife
  • Paint brushes
  • Small sharp scissors
  • Magnifying glass on stand with helping hands
  • Deluxe R/C modellers glue - love it for everything
  • Small right hand jig (did bring that)
I wanted a cream painted chair with pink silk, padded seating.  In my infinite wisdom I had decided that acrylic paint would be too thick for such fine pieces so I went on a hunt at Michaels for paint pens, stains, even markers but I couldn't find the colour I wanted.  I bought something called Distress Paint by Rangers paints.  It looks and smells like a thin acrylic but is no where near opaque enough.  It soaks into the wood like a stain which is good, but barely changes the colour and didn't make the slightest impact on the dark edges.

Over to plan two - use a wood stain.  As an experiment to compare two makes of wood stain pens I bought a Min-wax Golden oak for one set of furniture and a Marvy Woodstain marker in dark walnut.  I thought the walnut would be good in this case as it should cover a multitude of sins.  Wrong!  Over the base coat of cream it produced a rather patchy mauve/purple colour and there is no way of buffing this combination to a silky sheen.

My chair now is totally the wrong colour and probably no use for the bathroom in The Gate House.

If  I use my usual glue I can stick any material I have ever used  to anything and it doesn't matter if it is painted or stained before or after; the glue allows for that.  Not so with wood glues and tacky glues. I used both on the chair but they both stayed resolutely slightly rubbery.  I suppose it won't matter because once the chair is in place somewhere it won't be getting moved much.

Here is the end result, not a thing of beauty but mine own!  I assure you the frame is a funny grey/purple colour and the silk is a lovely pale pink slub.


Here it is sulking.....


High resolution cameras do not do justice to tiny objects - they work far too well and magnify every little blemish.  It is actually much better looking than this when reduced to the 7/8ths of an
inch it occupies in real space.


I went on to add a bunka piping but that was much too chunky.  I knew I should have pulled it thinner as I applied it but I found it difficult enough to do as it was.  I might just strip the fabric parts off and redo - all good experience and learned a lot about what not to do next time!


My second make was another Karen Carey kit - her grandfather clock.  Hard to believe it has eleven pieces.

I am spoiled for choice as to what to do next as I have quite a lot of things to choose from.... and probably even more after next weekend.  (Sarasota Show) If you want to see what I have bought so far click on the Purchases photo album link over in the left hand column.